I can't express how excited I am that you found this site, this place - my place.
I hope you get a bit of enjoyment and a smile comes to your face when you read my posts and look at my work. Enjoy -

Tuesday, June 29, 2010

Ribbon, ribbon, everywhere!

I just saw this question on Tammy's blog at http://www.cricutcritters.com/ and thought I'd show you what I use.

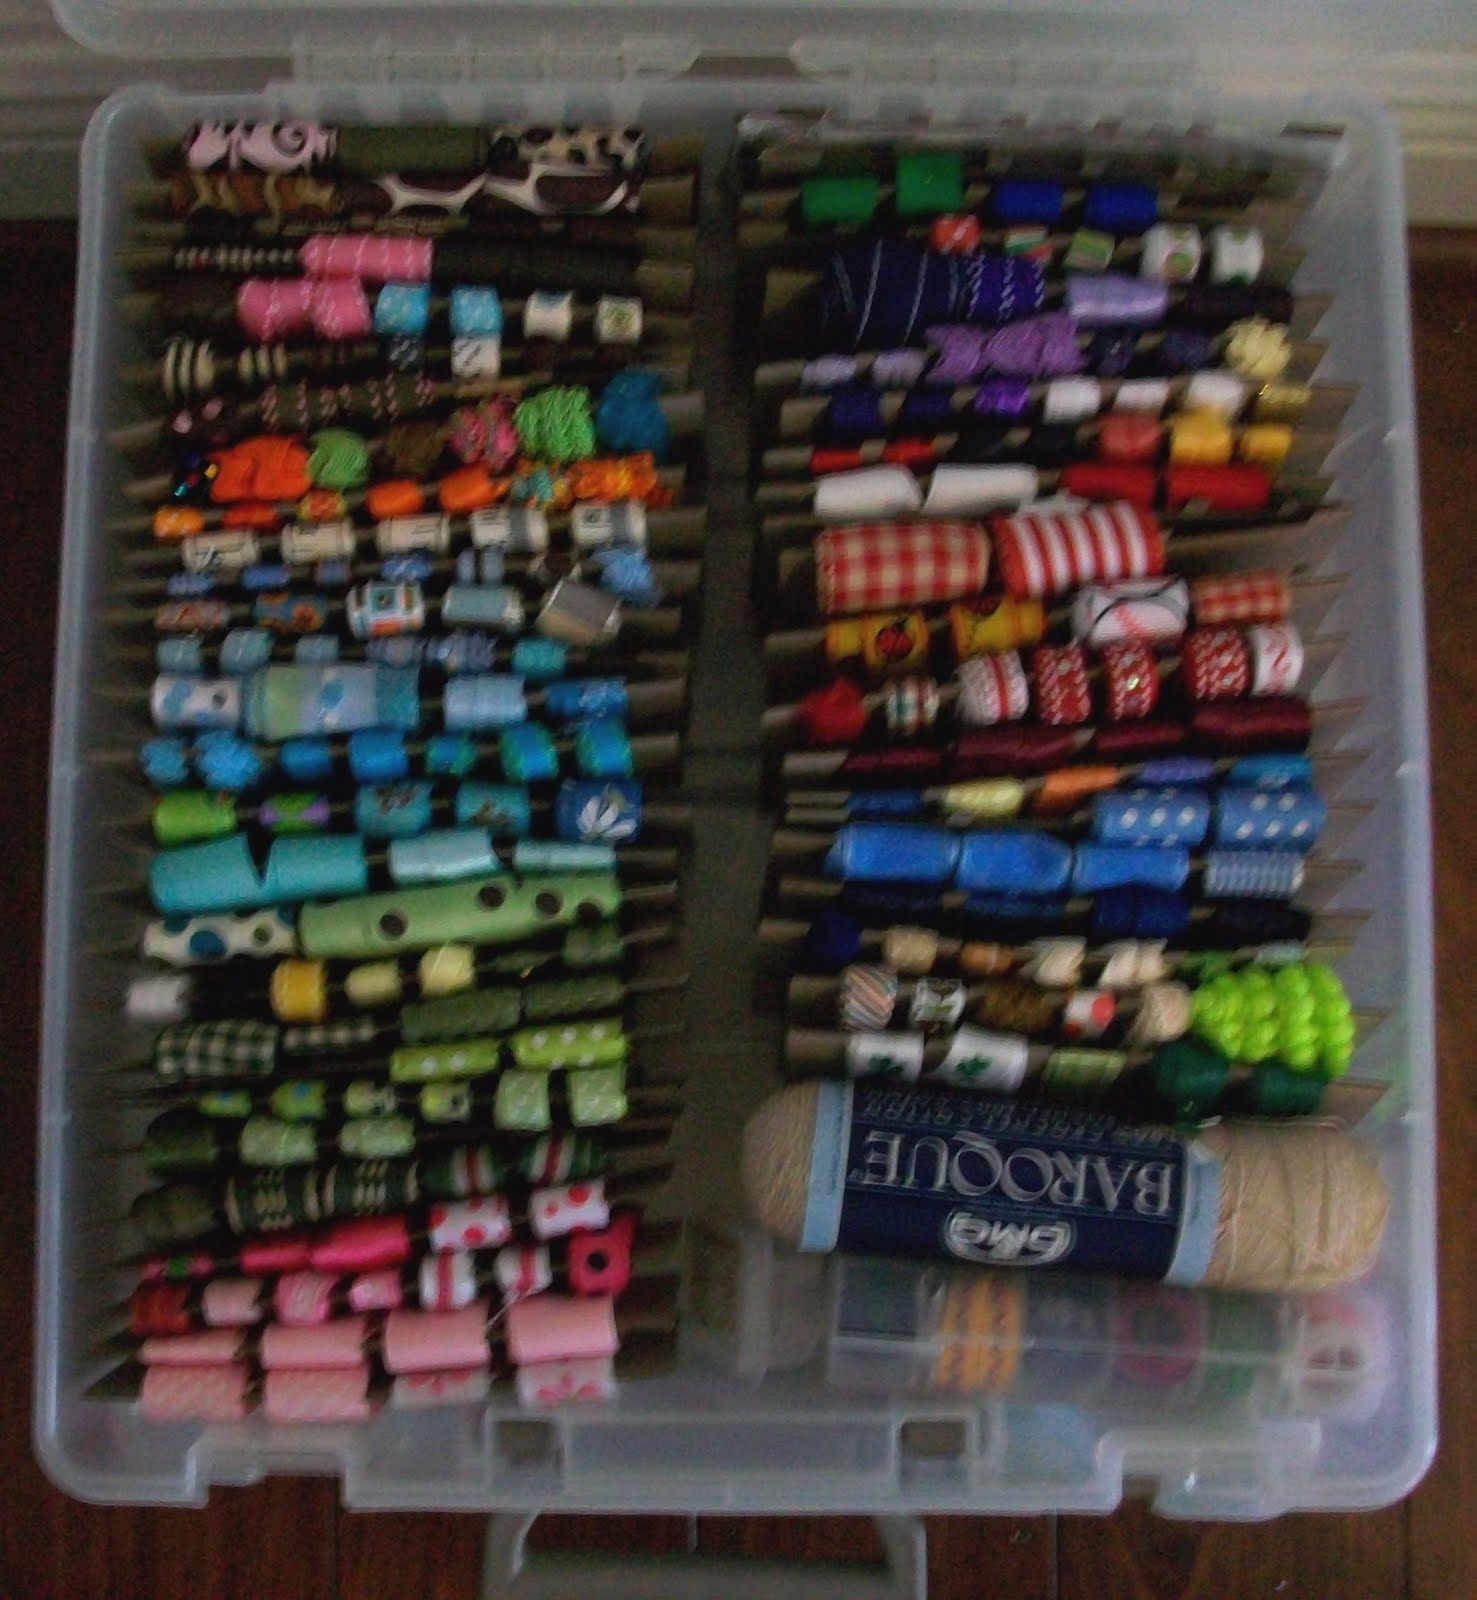
I use an Artbin holder with handles that latches shut to store my ribbon.  These ribbon wraps are from magistical memories and the neat thing about them is that they're portable and organized.  I can take this holder on crops or store it with my other scrapbooking supplies.  Check out the picture above -

As you can see, I have all my ribbon organized by color.  It makes it so much easier to match colors and find the appropriate size.  The ribbons are secured by tiny straight pins that I picked up from Michaels.


Remember, look in my archives under "Organization Stuff" to find the details.  If you need more info, let me know and I'll try to email you.

Aren't they the coolest ever???  ;-D

Monday, June 28, 2010

Belated Birthday Greetings


Hi guys - This card was made for a card swap in August. I decided that I wanted to do something a little bit different and use a cartridge that's not often used or acknowledged.  This cartridge is as cute as it can be and has lots of appropriate sayings for all sorts of occasions.

I took the frame feature on Paper Pups and used the hide contour feature to hide all the cuts on the inside.  Then I copied and flipped the copy in order to weld the two sides together.  All the designs were made to fit a 5X5 card and envelope. I did all my design on DS because Gypsy didn't have the option of hiding contours at the time.

I added another page and put the shadow for the cut on the next page. I added all the shadows that I could fit on the page (one of the glories of DS and gypsy) in order to get a set of 10.

Finally, I cut the outline on another page.  Before cutting, I outlined the cut with markers and then cut the outline.  I don't have anything fancy to do this with.  I used the Cricut markers that fit into the housing.  I used brown to do the outline.  I then filled in the eyes and nose with the same brown marker.  Using a red sparkly gel pen, I filled in the mouth because I wanted it to look like the dog's tongue.

I typed the inside on my computer and added paw prints from clip art. I got six on a page and matted it with a paw print paper.

By the way, the bone was cut from Paper Pups also and the sentiment on it was hand written.  Enjoy - :-D

Saturday, June 26, 2010

Emma's Challenge - 54


Hi guys! This page is in response to Emma's challenge 54 (and our need to find a new home for these sweet kitties). I happened to be at a crop this weekend and used this to advertise the need for a new home for these kitties.

The paper is from DCWV and from two different stacks. The cat head, mouse, journal tag, and cat border is from Doodlecharms. The word "kitties" is from Doodletype, and the word "Free" is from Cricut Office. I faux stitched the title in black ink. I also pop dotted the mouse and used the MS punch "layered arches" to cut the border strip on the side and was 2.25 inches wide before punching.

Hope you like it. And . . . if anyone would like some free kitties and if you live in the panhandle of Florida, let me know. :-D

Thursday, June 24, 2010

Wedding Cake

This is a wedding cake that I made for a very close friend of my daughter back in May.  The bride was a "thoroughly modern Millie" type of bride and wanted something super simple.  There was not a cake topper and I tried to make the cake exactly like the picture she sent me.  The cake was white cake with simple buttercream icing.  The "O" monogram ended up being a wooden letter that my husband cut out for me.  I painted, glittered, and then polyurethaned it.  It was attached by placing a couple of toothpicks in the cake at the point of contact and literally hanging the monogram off the cake.  I didn't want the wooden letter to come in contact with the cake.  Because everything on the cake was white, the toothpicks didn't show because I hid them with buttercream icing.

I didn't use the Cricut cake machine or any type of papercrafting item.  This was all old school cake decorating.  (I used to do this for a way to make some $$$ before I went back to school.)

Enjoy -

Wednesday, June 23, 2010

My Home on the Gulf

The news came today that tar balls have begun to heavily litter the beaches of Pensacola.  For those who love our natural environment around the Gulf of Mexico as much as I do, this news is extremely sad.  My heart aches for those who've lost jobs and their livelihoods because of this mess.  I'm posting two pictures taken at a local state park on the Gulf back in May.  These pictures are of two common birds that live and roost on our shores.  Because of the oil spill, these great birds are in danger of losing their homes and livelihoods too. 

My hope and prayer is that this oil mess can be cleaned up soon and that God's great plan includes a way for nature to continue to be resilient.   I'm looking forward to the coast being able to bounce back in order for the balance to be restored to this beautiful and important resource.  

Thank you for putting up with my ramblings.  I have a picture of a wedding cake that I'll try and post tomorrow. 

By the way . . . congrats to the U.S. soccer team for their victory in the World Cup today.  Woohoo!

Tuesday, June 22, 2010

"B" is for Boy - Cricut Lite

This card is for a card swap for my next crop at my church. I used Lyrical Letters to make the label shape in the background and used the hide contour feature to hide the oval cut-out in the center. The scrollwork is from LL also. The flower, however is from "B" is for Boy Cricut Lite cartridge. I love this one! I needed some boy cuts to do pages for my son.

I used K and Company paper along with some generic cream colored cardstock that I cut in half for the card. I pop-dotted the flower and printed the sentiment on my computer. I'm getting to a place where printing sentiments for cards en masse is so much easier on my compu-ta-ter.

Once again, I digress. Anyway, I used a slightly darker cream cardstock for the inside and cut more scrolls for the inside to give it some pop. I've found that I need to give some weight to the inside of my cards in order to balance the card.

Anyway, it's not my usual card, but I like the slightly more formal nature of this one.

I've got to get my stuff ready for the crop this weekend. Yikes!!! Got to go . . .

Emma's Challenge or Peachy Keen Stamps- ???

I think this was a challenge for Peachy Keen Stamps and I don't think I made it in time, but I'm putting this card out there. It's not actually entered in a challenge. I made it using only the Life Is A Beach cartridge. I used DS because my Gypsy needed charging.

The only part that used a new sheet of paper was the sun. Everything else was cut using scraps. I used google eyes for the shark because he needed to have some fun too! The fish on the side are colored using scraps of glitter paper and inks and the seaweed is the negative scraps from another cut several weeks ago. I pop dotted a couple of the waves to give it dimension. The sentiment is typed on my computer using colored ink. I couldn't get the font on the cartridge small enough so I resorted to my trusty-rusty computer.

Enjoy and check out Emma's blog at http://www.creativetimeforme.com/

Saturday, June 19, 2010

Another Throwback Challenge from Emma . . .

Hi guys - I made this card in 2 steps, vacation and home. The base was made while on vacation because my husband had to spend some time working (yeah, I know - vacation, really?) By the way, after 12 different pictures, this was the best one. Sorry I couldn't fix the blur -

So, anyway, I used two different paper lines (DCWV and K and Company) for the colored papers background. Is it considered tacky to mix and match different lines? Oh well, when your options are limited, you do what you can using what you have.

I had been all around to different Michaels looking for the MS border punch, Layered Arches, and decided to use it for the teal strip. After all, I used what I had because I wasn't going to spend any more $$$ that I needed for the vacation.

I digress . . . anyway, the challenge called for Paper Dolls for Everyday and I had no idea what to do. I pulled out my Peachy Keen face stamps and couldn't resist this cute little face. I cut out the face from PDE at 2.25 inches and the hair to match. I pulled scraps of ribbon that I could tie around the hair and typed the sentiment on my computer in brown ink. I used brown ink to define the face. I didn't have any chalks but I did have a rosy pink pigment ink. I used a Q-Tip for the ink and made sure most of the ink was off before I swirled it around on the face. Then, I used pop-dots to make her stand out. By the way, I started her on vacation but finished her at home.

Hope you like her! I thought she turned out to be cute! Enjoy . . .

Tuesday, June 15, 2010

Creative Memories Sale

No pics to post, but I thought I'd let you know about a great sale going on this month at Creative Memories. They're having a "WOW" sale and if you don't have or know of a Creative Memories consultant, give Diane at http://www.mycmsite.com/sites/dianecampbellpayne a visit. She'll be able to help you out.

They have all sorts of paper and accessories on sale. They also have their storage stuff on sale at great prices. Check out the sales with Diane. Their stuff is quality and stands up to the test of time.

Friday, June 11, 2010

Save Our Gulf

In response to Emmas's Throwback Thursday challenge using Stretch Your Imagination Cricut cartridge, I built this 12x12 page. Because I'm a scuba diver and one who frequents the Gulf of Mexico, what has happened with the oil spill has made me physically ill. There's not a lot I can do, but I can express my frustration with the whole mess through my creativity. So . . . I did.

The waves are from Stretch and are a card feature that I used and stretched to make the water. I hid all the cut outs (a window and bubbles) to get just the waves. I'm cheap so I manuevered the waves on one sheet of Coordinations paper (don't you just love that stuff?) to get the most out of it. The turtle also came from Stretch. I flipped it, however, to get it to face the opposite direction. I used the mesh Cuttlebug embossing folder to get the texture on his flippers and I used another embossing folder (I'm not sure what the name is) to add texture to his carapace (upper shell).

I used Zooballoo for the letters for the title and did faux stitching on them. I used Life's a Beach for the coral, crab, shells, and sun. My page has more than just red, blue, and brown on it, but I think that's okay. I also used a Peachy Keen stamp for the sun's face.

Wouldn't it be nice if expressions like these could really make a difference? Hm-m-m-m-m-m . . . one never knows.

Thanks for looking.

Saturday, June 5, 2010

Hope Floats

This is a card I made for Emma's "Throwback Thursday" challenge. I have a friend who is going through a rough time and needed a bit of a lift. I used Animal Kingdom Cricut cartridge to build it and Design Studio. I welded two fish bowls together and cut two fishes out - one out of regular orange cardstock and the other one out of glitter cardstock. I Cuttlebugged the water and printed a sentiment about hope for the inside. I used a Nestability die to cut the sentiment out. I also inked everthing I could (except the green sparkly water plant) and stuck them together.

Hope you like it!

By the way . . . check out her blog. I'm going to try and put her button with my other ones. Wish me luck!