I can't express how excited I am that you found this site, this place - my place.
I hope you get a bit of enjoyment and a smile comes to your face when you read my posts and look at my work. Enjoy -
Showing posts with label Cards. Show all posts

Friday, March 2, 2012

It's Birthday Time!!!

It's my son's birthday (Happy Birthday, Jay!).  Can you tell?  I wanted to make him a card so I decided to make a Cricut-less card and use this opportunity to enter it into Emma's challenge.  Isn't it cute???

He loves to travel so I tried to incorporate his love to see new places with a birthday card and voila!  He's getting a suitcase!  Don't ya just love it?


Recipe:
* polka dot 8 1/2 X 11 paper from the sale bin at Michaels
* cream 8 1/2 X 11 paper for printing sentiment and names of places
* scrap craft paper
* scrap red paper
* scrap brown paper
* scrap light green paper
* brown ink

I cut the polka dot paper in half to get an A2 size piece (4 1/4 by 5 1/2) and folded it.  I used my Corner Chomper to round the corners (1/4 size).  I cut two 1 inch pieces of brown scrap paper in half diagonally to get the corners.  I rounded those as well.  Then I cut brown strips 1/4 inch wide for the straps.  With the small piece of brown paper left, I cut a 1 inch round piece with my paper punch and then cut 3/4 inch from the round piece to form the handle.

I inked each piece separately and adhered all the pieces to the places.  Before I forget, I cut a slit in the top of the card so I could fit the "handle" into the suitcase.  I taped the bottom of the circle down on the bottom of the inside of the card because I planned to mat the sentiment and cover it up.

I printed and cut out the names of the destinations and double matted them on light green paper first, then red paper.  I also cut out a rectangle for Jay's name out of cream cardstock and hand-cut a tag to back his name.  I zig-zag stitched the two together and tied the tag to the handle of the suitcase.

After I printed the sentiment, I inked and matted it to red cardstock.  Then, I adhered it to the inside of the card.  I inked the entire outside of the card and set it out to dry.

I hope he likes it.  Do you?  Still using my scraps . . . gotta love it!

Monday, February 27, 2012

Happy Birthday Scraps

Can you tell that I'm on a mission?  I have a TON of scrap paper that I want to use and what better way than to make cards and scrapbook embellishments. 

Today, I'm sharing a card for a friend of my daughter.  I decided that I wanted to add a bit of stitching to it, so I ruffled 1 1/2 inch ribbon and attached it to the card.  Let me give you the recipe first . . .

*card base - scrap patterned paper (as usual, don't know the name) cut at an A2 size
*Cricut cut - number mesh cut at 5x3.75 (Art Philosophy) out of craft paper
*green with brown polka dots ribbon from Hobby Lobby
*scalloped circle (1 3/4 in.) out of craft paper
*circle (1 5/8) out of brown scrap paper (didn't have a big piece)
*circle (1 1/2) out of the reverse side of the card base paper
*CTMH ink in New England Ivy
*birthday stamp set from Creative Time's "All Around Birthdays" stamp set


I cut and folded the card base.  Then I used the reverse side to make a base for the number mesh.  After adhering the mesh to the mat base, I ruffled the ribbon and stitched it on the mesh.  Then I stitched the mat onto the card base.  It may seem like a lot of sewing, but it's really not.

When all the layers were set, I stamped the "Happy Birthday" on the round green piece and adhered that to the other layers for the medalion.  I used pop dots for the medalion in order to raise it above the ruffles of the ribbon.  Otherwise, it may get lost in the dimension of the ruffles.

I hope the recipent likes it.  Can you tell how old she'll be on her next birthday??? teehee

By the way, I took the picture in the laundry room and I think it turned out better than my other ones.  I don't have a light box and haven't gotten around to making one.  I'm beginning to think that I don't need to.  What do you think?

Thanks for looking.  I hope you get inspired and can take something from this to create your own masterpiece.  Gotta love it!  :)

Friday, February 24, 2012

Once again, it's about the scraps . . .

I thought I'd share a baby shower card I made for a friend of my daughter.  If you look closely, you'll notice a bit of sheen on the embellishment (baby bottle).  I tried something new . . . I sprayed the embellishment with polyurethane.  I thought I'd try to add some sheen, but it may have backfired.

Anyway, I'm sharing it so you can see the effects.  By the way, before anyone asks, I sprayed it it separately from the card.  In other words, it was not on the card when I sprayed it.  It was hard to get a good angle, but I'm showing it in two different views.

WARNING . . . I'm really into using up my scraps.  I have so many parts and pieces of beautiful papers that I feel the need to use them up.


Recipe:
*premade A2 card and envelope in offwhite
*once again, scrap paper in pink gingham, light pink, dark pink, pink polka dot, light tan, and light green (gotta love it!)
*green ribbon with pink polka dots from Hobby Lobby
*EK success border punch
*CTMH stamp pad in New England Ivy
*CTMH stamp pad in Watermelon for the inking around the edges
*sentiment stamp from My Creative Time (love it!)
*light pink and kiwi green stickles


I cut the baby bottle at 3 inches from the Baby Steps Cricut cartridge.  I cut the little flower on the front of the bottle twice because the cut was with the bottle ring and I wanted it in different colors.  Because I cut it twice, I had extra cuts that just HAD to be used.  Know what I mean??? 

Okay, so I used the extra cuts to make the little tulip that graces the inside of the card.  Isn't it cute?

Anyway . . . that's it.  I'm off to help my daughter with this baby shower.  I'll try to take pictures of some of the other decorations I made and show in another post.  Gotta love it!

Thanks for looking . . . and in the infamous words of a former governor, "I'll be back!"  teehee

Saturday, February 11, 2012

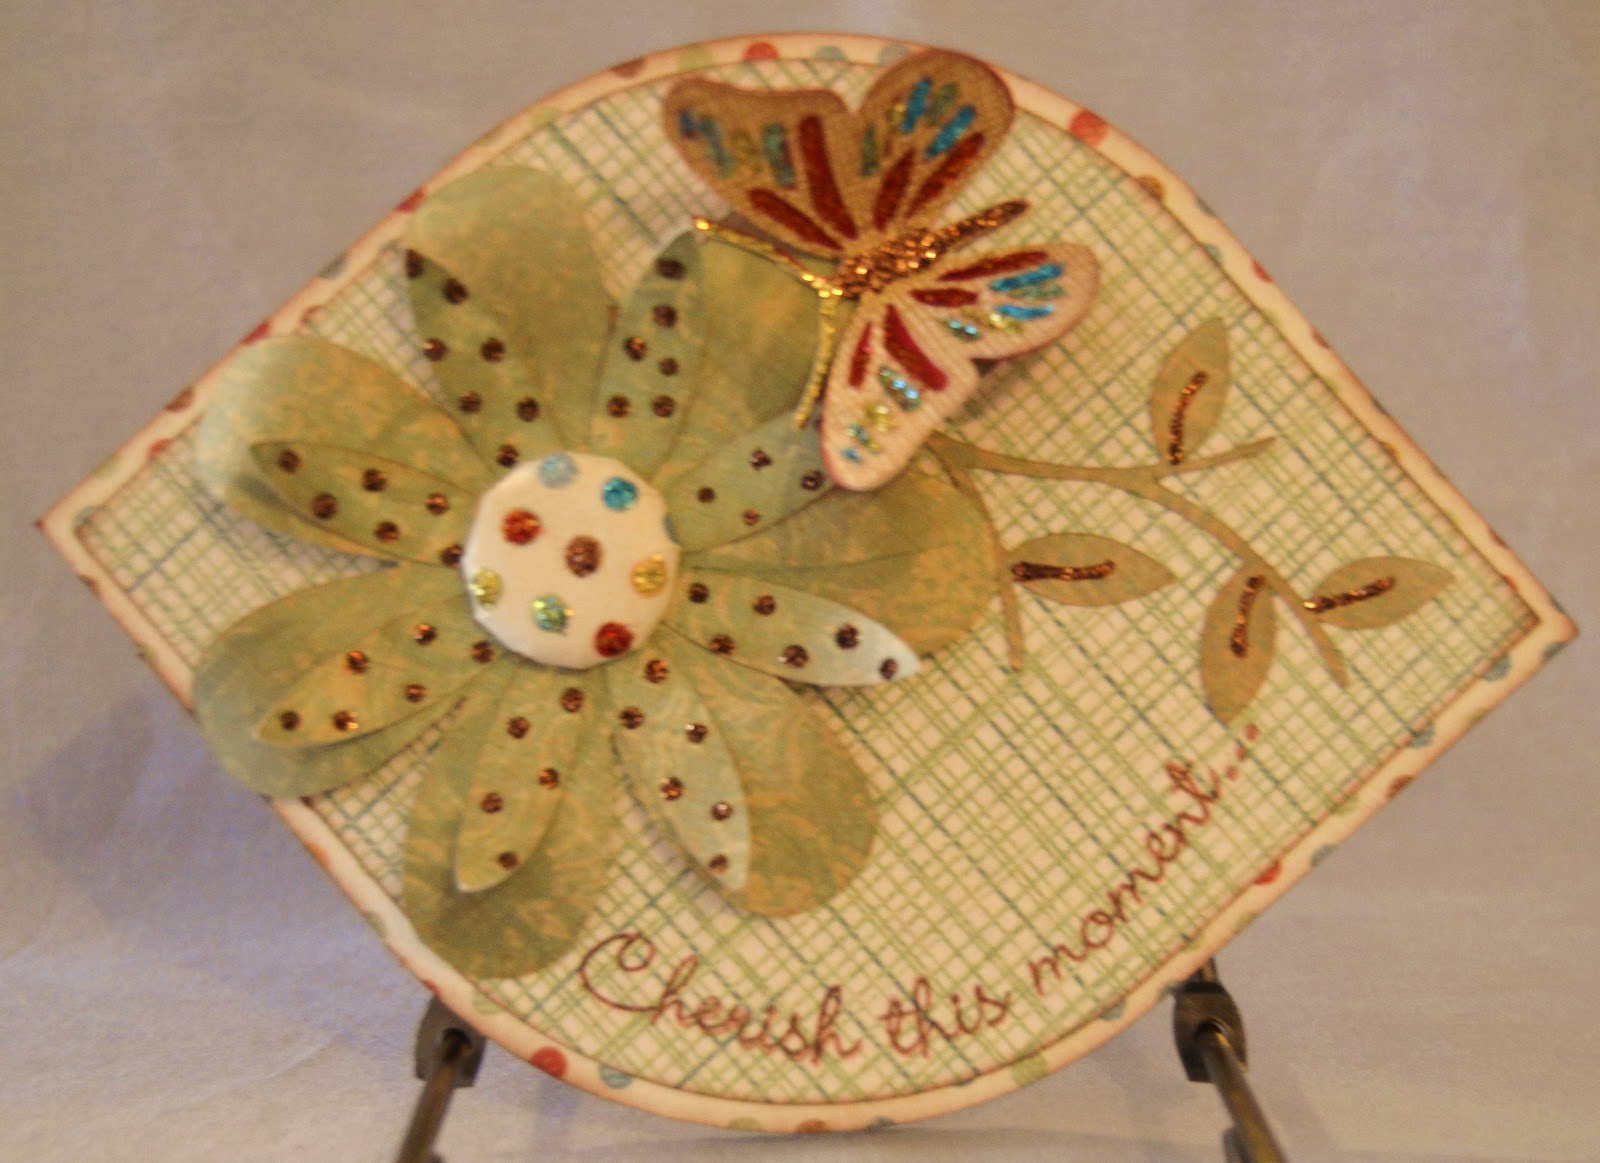
Cherish this moment . . .

Okay . . . so this time, I've made a card for a challenge organized by Emma on her blog at http://www.creativetimeforme.com/ The challenge was to make something with a bug on it. 

Well, my favorite bug (if there can be such a thing) is a ladybug.  They are cute, red, and ungross.  However, I don't want to "ladybug" myself out, so I thought I would try a butterfly.  I don't usually put butterflies on things because so many people use them, but I found the most beautiful butterfly shape I've seen on a Cricut cartridge, and it's on the Hannah Montana cartridge.  Who knew???


I need to apologize for the blurriness of the photo.  I can't seem to get my new camera operating to my expectations.  Could it possibly be the photographer?  I'll keep trying . . .  anyway . . .

The card shape and mat were cut at 5 inches and 4 3/4 inches respectively from my Art Philosophy cartridge. The card is cut from a multi-colored polka dot pattern (scrap paper) that is white on the back so the inside of the card is white.  I used a mat that's a green weave pattern for the cover (using up my scraps here).  I cut the butterfly out at 1 1/2 inches (using Coordinations cardstock) and the shadow (in a basic red) is the same size.  I inked the edges in dark brown and then I went Stickle crazy.  I used the same colors for my Stickles that are on the background paper.  The flowers and branch are also out of scrap paper (gotta love it!) and also came from the Art Philosophy cartridge.  I used Emma's "Cherish This Moment" stamp from her "Cherish This Moment" stamp set.  One of the cool things about her stamps (other than the quality) is the fact that you can curve them on your block.  Isn't that just the neatest thing?  I love it!  Next time, I'll use a darker brown for the stamp, but I think it still turned out beautifully.

Using up scrap paper . . . I have so many neat patterns and pieces that go so well together.  Unfortunately, I've cut the name off so I have no idea where or what the pattern is from.  Sorry . . .

I think this one is my favorite.  I really REALLY like the bling.  Hope you like it too. 

Ah-h-h-h-h . . . another project down.  Gotta love it!
Thanks for looking and I'll be around . . .  :)))

Monday, July 5, 2010

Black and White Card

This is a sympathy/concern card made for a card swap at my church.  Unfortunately, there always seems to be a need for this type of card.  I made this using the Victoria embossing Cuttlebug folder on the white background while using a black and white flocked cardstock to add even more texture to the front.

On the inside, I put a white piece of cardstock in order to have a handwritten note, and I cut a strip of the flocked cardstock to give it weight and to connect it to the front.  The sentiment on the outside is from a generic stamp that if found at Hobby Lobby.  I've had it for a long time or I would give the name of the stamp brand.
:-)

The label for the outside sentiment is cut twice - once in white and once on black.  I cut the sentiment labels from a cricut cartridge that I can't remember the name of.  I made this card several months ago and I didn't record the cartridge I used.  Truthfully, I never thought anyone else would see it. lol

Anyway, I hope you like it.  I was an easy card to make.